Get Started with RAE
rae (short for “Robotics Access for Everyone”) is a small desktop robot developed for evaluation of the Luxonis ecosystem and rapid prototyping of robotics applications. It is designed to be a low-cost, easy-to-use, and extensible platform.It’s built on top of the RVC3, which along with AI, CV, video encoding, and stereo depth features, also supports on-chip VIO and Sparse SLAM. rae is running ROS2 which handles path planning and navigation.This section is created as a guide for first-time users of RAE.Power it on
Press the power button, which is located on the bottom side of the RAE, to turn it onIf RAE doesn't turn on, try plugging it to a charger first. Make sure to use the side USB port.
Sign into Luxonis Hub
Open robothub.luxonis.com and sign in using your email and password (if you don't have account simply register one for free).Connect RAE
Now it's time to set up Luxonis Hub for RAE.In the Devices section on Luxonis Hub click on theConnect Robot button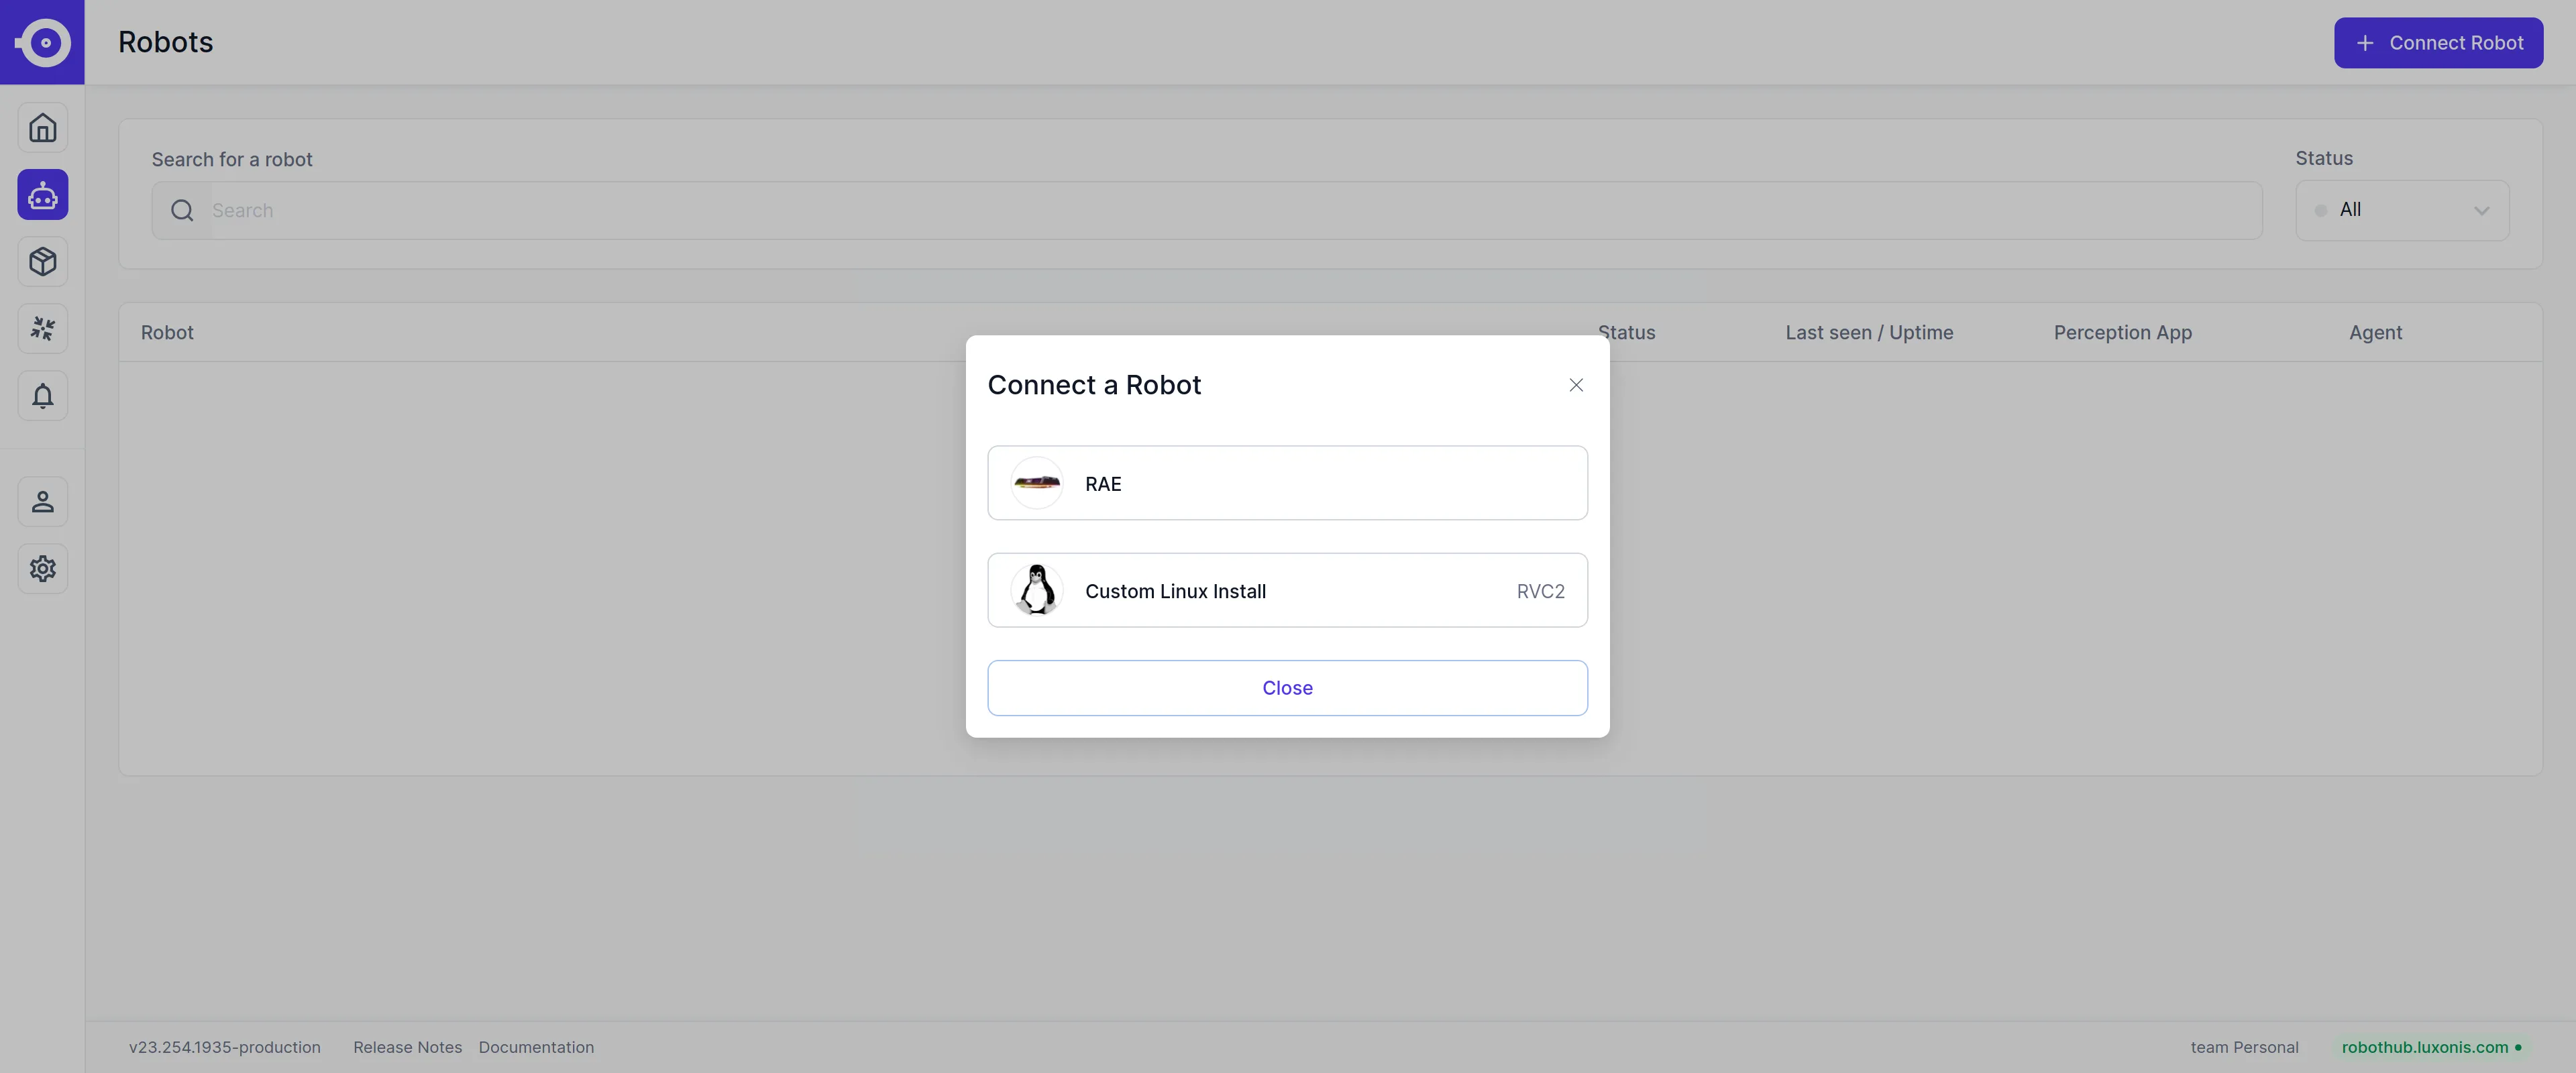 Select RAE
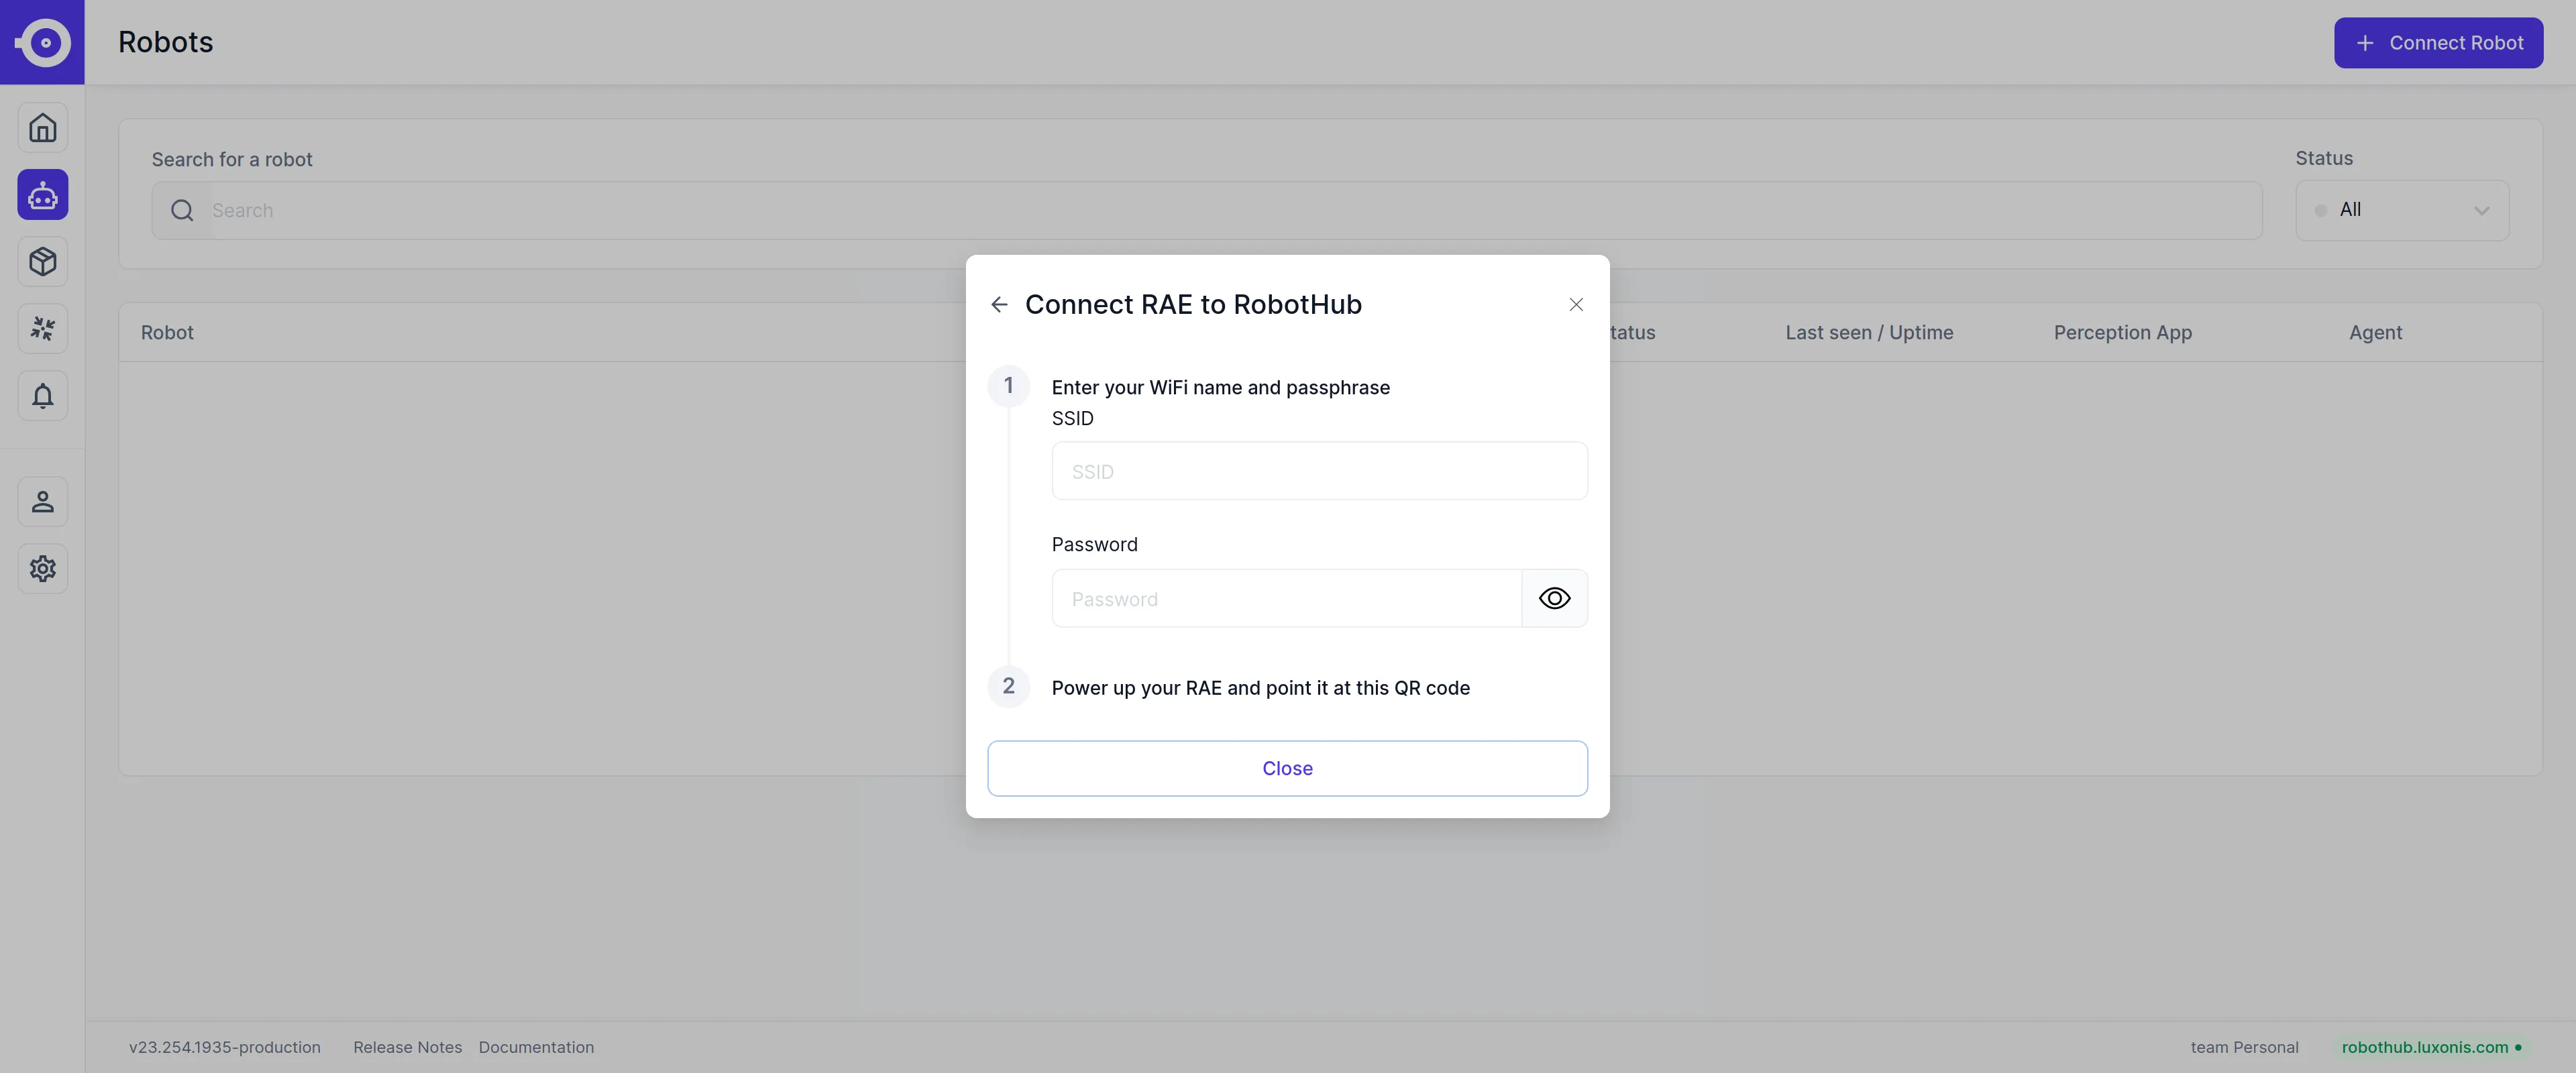 Fill out the name and password for your WiFi
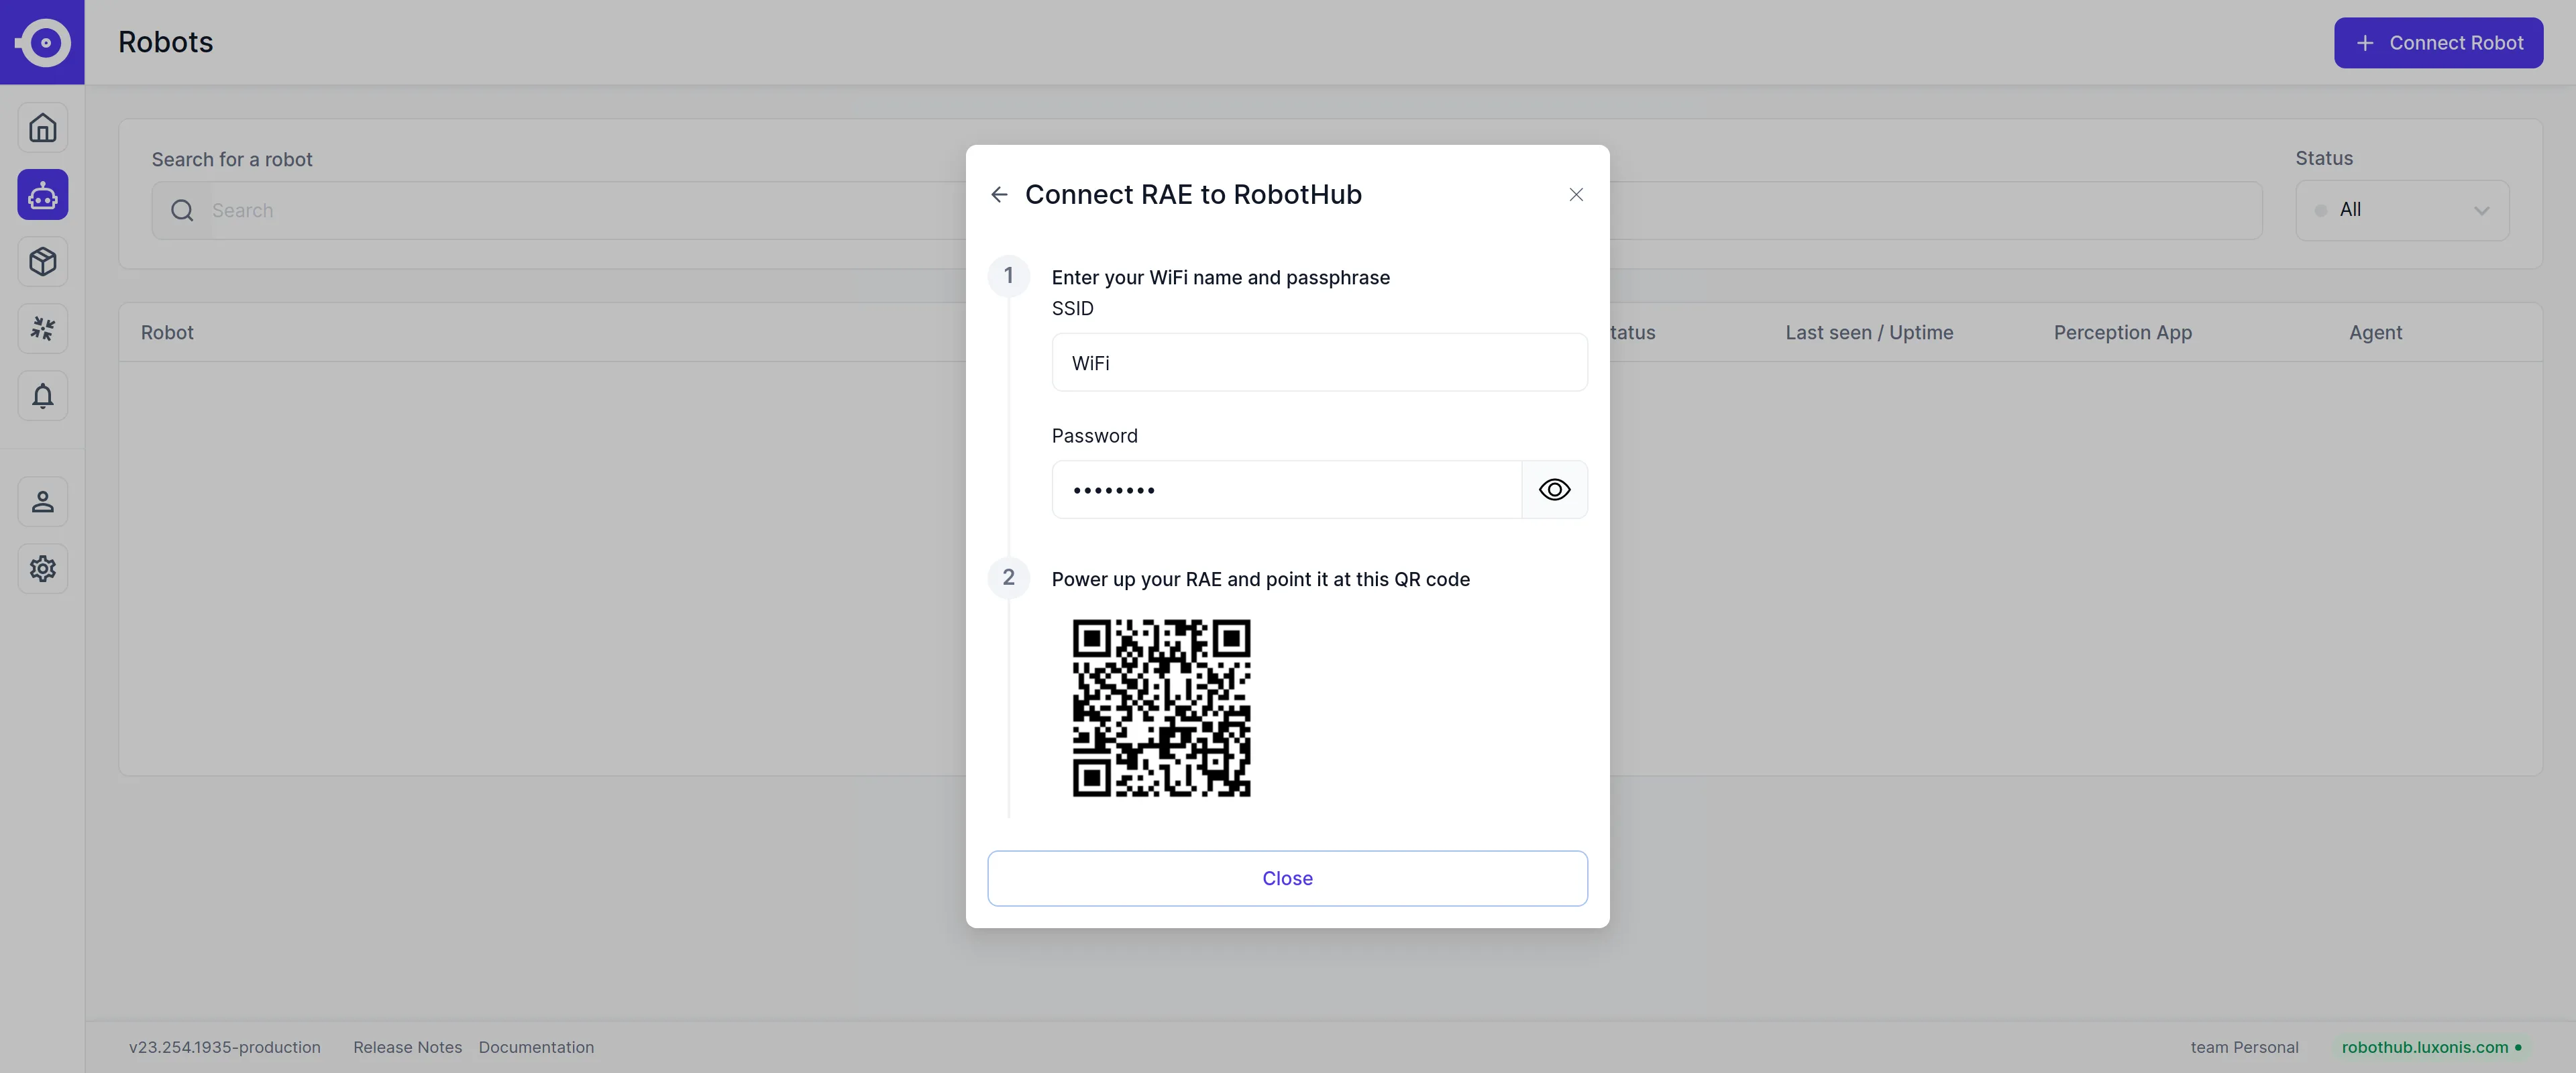 Pick up your powered-on RAE and point its main camera at the QR code on the screen.As soon as RAE manages to read the QR code it will display the network name.
The current RAE firmware has a bug where it might shortly flash red / signal failure, while still appearing in the Luxonis Hub a few moments later. This issue will be addressed in a future firmware release.
Finishing up
Now your RAE is successfully connected to Luxonis Hub.If you want to reconnect RAE in the future you need to first reset it to its factory settings. This can be done by pressing a button at the bottom of RAE with a needle for 10 seconds.
Connect to RAE
Now you have to switch RAEs internal WiFi for your local network.You can do this in two ways:a) WiFi- RAE will create a WiFi access point with the following credentials:
Text
1SSID: RAE-<ID>
2Password: wifiwifi@
3RAEs IP: 192.168.11.1- Open the WiFi settings on the device you are currently using and log into the AP with the provided credentials
- You use SSH to directly access everything except the system which is write protected
- Follow this guide on how to connect a linux system to wifi via the command line
- Plug RAE to your computer with the provided USB-C cable
- Open your command line and connect to RAE through SSH with the provided credentials
Text
1root@192.168.197.55 (no password is required)
2RAEs IP: 192.168.197.55- You can use SSH to directly access everything except the system which is write protected
Connect RAE to WiFi
Now that you are successfully connected to RAE it is time to make RAE connect to the local network.- Run the following command in your terminal to generate a passphrase for your network
- When prompted enter your WiFi password
Command Line
1wpa_passphrase <WIFI_SSID>- The output should look simalar to this:
Command Line
1network={
2  ssid="<WIFI_SSID>"
3  #psk="<WIFI_PASSWORD>"
4  psk="<PASSPHRASE>"
5}- Edit the content of
/etc/wpa_supplicant.confso that its credentials match your WiFi settings
Command Line
1ctrl_interface=/var/run/wpa_supplicant
2ctrl_interface_group=root
3network={
4    ssid="<WIFI_SSID>"
5    psk="<PASSPHRASE>"
6}- It is also necessary to edit
/etc/systemd/network/20-wifi.networkso it contains the correct information
Command Line
1[Match]
2Name=wlp1s0
3
4[Network]
5DHCP=ipv4
6
7[DHCP]
8UseDomains=true
Reboot RAE
After editing all the settings it is time to apply them and reboot RAE- Run the following commands on RAE
Command Line
1systemctl stop hostapd
2wpa_supplicant -B -i wlp1s0 -c /etc/wpa_supplicant.conf
3systemctl restart systemd-networkd- If the connection to Luxonis Hub won't be necessary it is also recommended to to disable Agent
Command Line
1robothub-ctl stop
2robothub-ctl startup disable
Finishing up
Now your RAE is successfully setup.If you want to later reset RAE to its factory settings. This can be done by pressing a button at the bottom of RAE with a needle.
- Find the IP address of RAE, this can be done for example with WiFiman
- Copy and paste the
https://<IP of RAE>:9010into your preferred browser
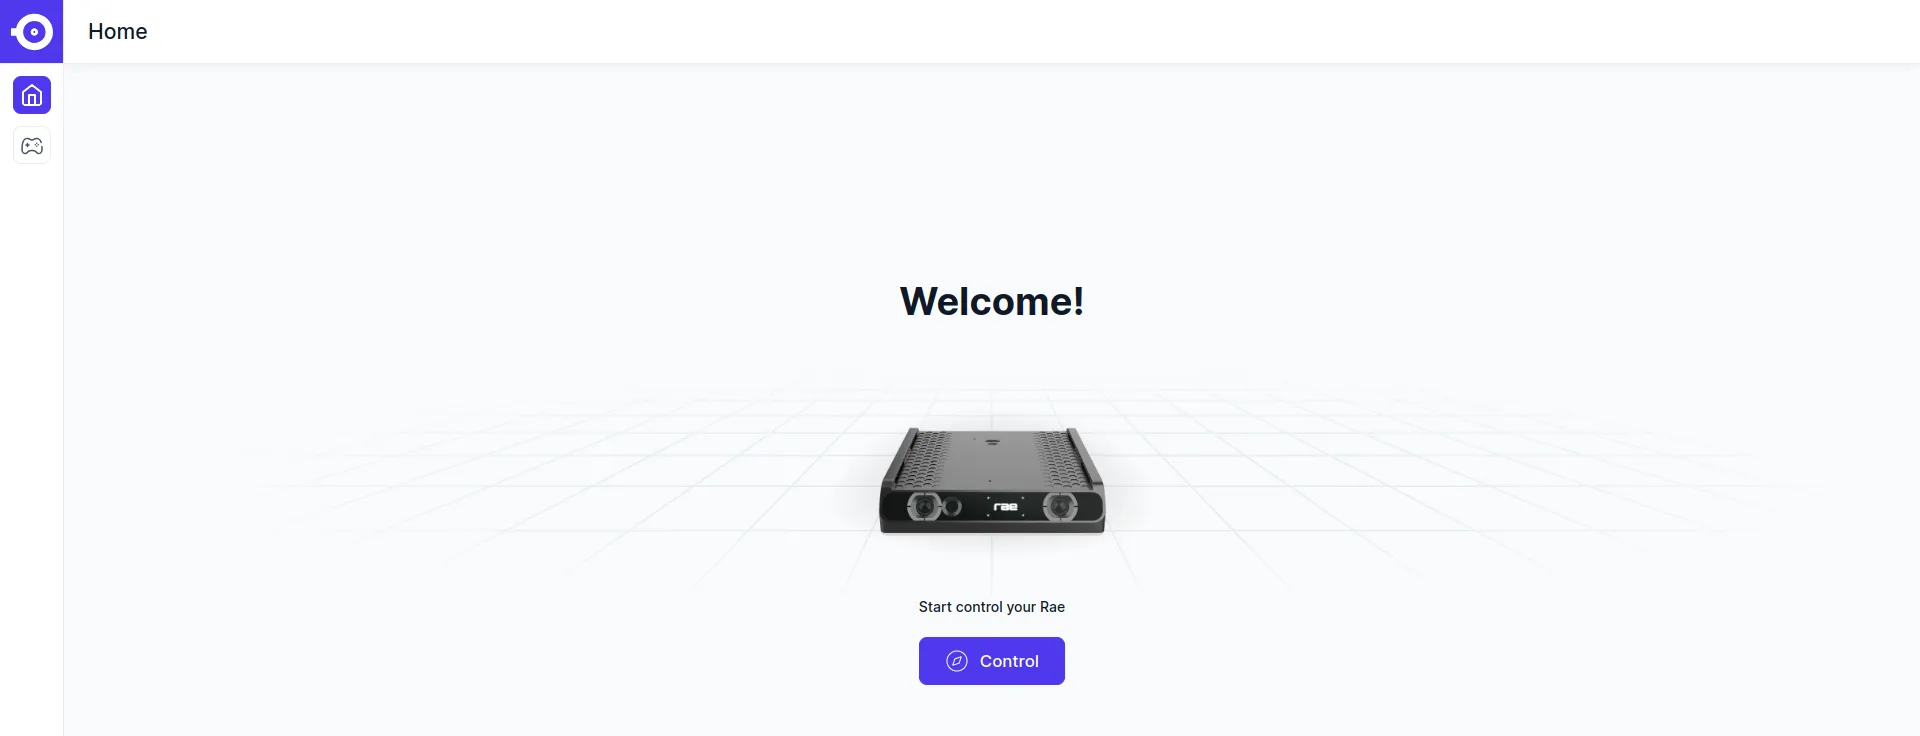
- Click on
Control